Ceiling Fan Installation in The Dominion, TX

Need Safe, Professional Ceiling Fan Installation?
Dealing with an outdated or non-functional fan? Ensure your new ceiling fan is installed correctly with professional help. If you need immediate assistance with wiring or mounting a new unit, schedule a licensed electrician.
Attempting to install a ceiling fan without the proper electrical knowledge or tools can lead to wobbling fixtures, noisy operation, and significant safety hazards. Homeowners in The Dominion need reliable airflow to combat the Texas heat, and professional installation guarantees that your cooling system works efficiently alongside your HVAC.
- Enjoy peace of mind with installations backed by a full warranty.
- Get your fan installed on the same day you call.
- Expert installation ensuring optimal performance and safety.
All services are fully licensed, ensuring compliance with local electrical standards and building codes.
Expert Ceiling Fan Installation at Home
Proper air circulation is essential for maintaining comfort, particularly in regions with high summer temperatures. While a ceiling fan does not lower the actual temperature of a room, it creates a wind-chill effect that allows you to feel cooler without overworking your air conditioning unit. However, achieving this level of efficiency requires more than simply connecting a few wires. It demands a secure structural mount, precise balancing, and adherence to electrical codes.
Residents in The Dominion often have homes featuring high vaulted ceilings, custom architectural details, or specific outdoor living spaces that require specialized installation techniques. A standard installation involves removing an existing light fixture or fan, verifying the integrity of the electrical box, and securely mounting the new unit. If the existing electrical box is not rated for the weight and vibration of a ceiling fan, it must be replaced to prevent the fixture from falling.
ReliaBee Air, Electric, & Plumbing focuses on the technical precision required for these installations. Whether the project involves a standard 8-foot ceiling or a two-story foyer requiring scaffolding, the goal remains the same: safe, vibration-free operation. Professional installers assess the wiring to ensure it can handle the load, check for proper grounding to prevent electrical shock, and assemble the fan blades to ensure perfect balance. This attention to detail prevents the common annoyance of a clicking or wobbling fan, ensuring your home remains quiet and comfortable.
Today’s Ceiling Fan Installation: What’s Included and Time Estimates
When you schedule a professional installation, you are paying for technical expertise and labor that covers every aspect of the job, from unboxing to the final switch flip. Understanding the scope of work helps homeowners prepare for the appointment and ensures there are no surprises regarding timelines or requirements.
Scope of Installation Services
- Site Assessment: The technician begins by inspecting the installation site. This includes checking the existing switch wiring and the ceiling junction box.
- Removal of Old Fixtures: If replacing an existing unit, the technician safely disconnects and removes the old fan or light fixture.
- Electrical Box Upgrade: A critical step involves verifying that the junction box is "fan-rated." Standard light fixture boxes cannot support the dynamic load (movement and weight) of a ceiling fan. If a non-rated box is found, the technician will install a heavy-duty brace and box.
- Assembly and Wiring: The fan motor, housing, and blades are assembled. Wiring is connected using proper gauge wire nuts and electrical tape, ensuring a secure connection to the home’s power supply.
- Downrod Sizing: For rooms with higher ceilings, the technician cuts or selects the appropriate downrod length to ensure the fan hangs at the optimal height for airflow (usually 8 to 9 feet above the floor).
- Balancing and Testing: Once mounted, the fan is tested at all speeds. Weights are applied if necessary to correct any minor imbalances that cause wobbling.
Time Estimates
- Standard Replacement: If a fan-rated box is already present and the ceiling height is standard (8-10 feet), installation typically takes between 60 to 90 minutes.
- New Installation (No existing wiring): Running new wiring to a ceiling center and installing a new switch leg increases the time significantly, often taking 2 to 4 hours depending on attic access.
- High Ceilings: Installations on ceilings exceeding 12 feet require specialized ladders or lifts, extending the installation time to approximately 2 to 3 hours due to the complexity of the setup and safety measures.
Your Installation Process: What to Expect
Knowing the specific steps involved in the installation process allows for a smooth service experience. The process is designed to maximize safety and cleanliness while minimizing disruption to your daily routine.
Preparation and Safety Verification
- The technician arrives with all necessary tools, including voltage testers, wire strippers, and support braces.
- Power is shut off at the main breaker panel to ensure the circuit is completely dead before any work begins.
- Flooring and furniture below the installation site are covered with drop cloths to catch dust, drywall debris, or packaging materials.
Mounting the Bracket
- The mounting bracket is the most important structural component. It is secured directly to the ceiling joist or the fan-rated box brace.
- Technicians ensure the bracket is level; even a slight tilt can result in a significant wobble once the downrod and motor are attached.
- For sloped ceilings, a specialized angled mount is used to allow the fan to hang vertically without hitting the slope.
Wiring and Receiver Installation
- If the fan includes a remote control or smart home integration, the receiver unit is wired into the canopy at this stage.
- The technician connects the ground, neutral, and hot wires, ensuring they are tucked neatly into the canopy to avoid pinching or shorting.
- Wall switches are updated if necessary. This might include installing a dual switch (one for the light, one for the fan) or a variable speed control slider.
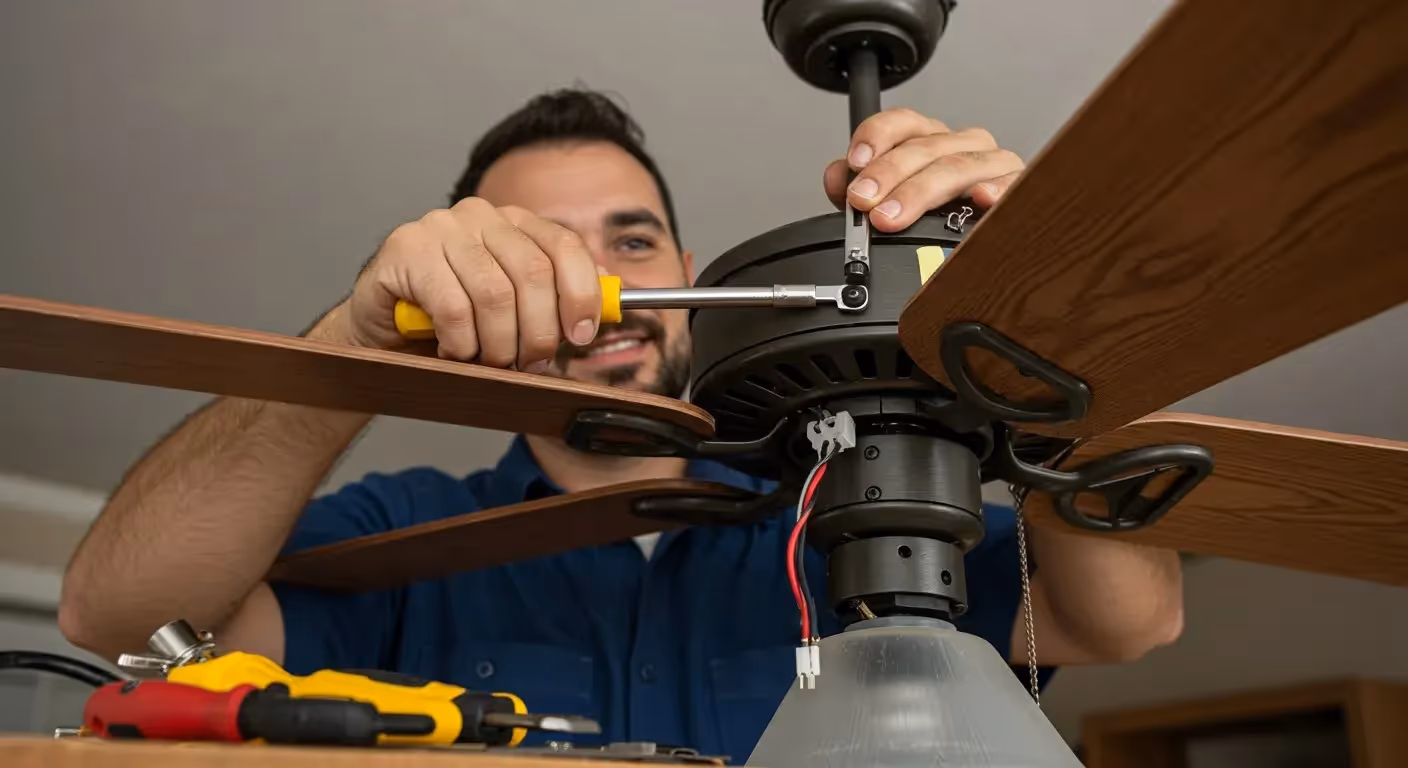
Motor and Blade Attachment
- The motor housing is lifted and seated into the mounting bracket.
- Blades are attached using lock washers to prevent screws from loosening over time due to vibration.
- Safety cables (if equipped) are attached to the joist as a fail-safe mechanism.
Final Configuration and Cleanup
- Power is restored, and the fan is cycled through all speeds.
- The direction of the fan is checked to ensure it pushes air downward for summer cooling.
- All packaging, old parts, and debris are removed from the premises.
Replacing vs. Repairing: A Cost Effective Decision
Homeowners often debate whether to repair a malfunctioning fan or invest in a replacement. While high-end fans are built to last, wear and tear eventually degrade internal components. Making the right financial decision depends on the age of the unit, the nature of the problem, and energy efficiency goals — explore our financing options.
When Repair Makes Sense
- Capacitor Issues: If the fan hums but doesn't spin, or only spins when you give it a push, the capacitor is likely bad. This is a relatively inexpensive part to replace.
- Switch Failure: Pull chains or wall switches that stick or fail to engage can often be swapped out without replacing the entire fan unit.
- Cosmetic Issues: If a blade is cracked but the motor is fine, replacement blades are often available from the manufacturer.
When Replacement is the Better Option
- Motor Noise: Grinding, buzzing, or loud humming sounds usually indicate internal motor bearings are worn out. Motors are rarely cost-effective to rebuild; replacement is the standard solution.
- Severe Wobbling: While balancing kits fix minor issues, severe wobbling often indicates a bent shaft or warped motor housing, which presents a safety risk.
- Energy Inefficiency: Older fans use AC motors that consume significantly more electricity than modern DC motor fans. Upgrading can lower energy usage by up to 70%.
- Outdated Aesthetics: If the fan looks dated or doesn't match a newly renovated room, replacement provides both functional and aesthetic upgrades.
- Lighting Quality: Older fans often have integrated lighting with poor output or obsolete bulb sockets. New models offer integrated LED technology with adjustable color temperatures.
If the cost of repair approaches 50% of the price of a new, modern unit, replacement is generally the recommended path. This ensures you get a new warranty and updated technology.
Local Compliance and Seasonal Installation Tips
Operating in The Dominion involves specific considerations regarding local building codes and the distinct South Texas climate. Electrical work in this area must adhere to the National Electrical Code (NEC) as adopted by local municipalities. This includes requirements for arc-fault circuit interrupter (AFCI) protection in bedrooms and proper box bracing.
Permitting and Safety Codes
- Fan-Rated Boxes: Local code strictly prohibits mounting ceiling fans to standard light fixture boxes. This is a primary point of failure inspection during home sales.
- Dedicated Circuits: If a new circuit is being run to a location that previously had no power, a permit may be required.
- Outdoor Ratings: For patios and verandas common in The Dominion, fans must be "Wet" or "Damp" rated. Installing an indoor-rated fan outdoors violates code and voids manufacturer warranties because moisture will cause the blades to droop and the motor to short.
Seasonal Optimization
- Summer Settings: During the hot summer months, ceiling fans should rotate counter-clockwise. This pushes air straight down, creating a wind-chill effect that evaporates moisture from the skin, making the room feel up to 8 degrees cooler.
- Winter Settings: In the mild winters, switch the fan to rotate clockwise at a low speed. This pulls cool air up and forces the warm air gathered at the ceiling out towards the walls and down into the living space, improving heating efficiency without creating a draft.
- Blade Pitch: When selecting a new fan for installation, look for a blade pitch between 12 and 15 degrees. This angle moves the most air efficiently, essential for large rooms with high ceilings.
Ensuring Safety and Efficiency
Choosing the right professional for ceiling fan installation is about ensuring the long-term safety of your home’s electrical system. Poor connections can lead to intermittent power issues, overheating wires, or even fire hazards behind the drywall. Furthermore, a fan that is not securely braced poses a physical danger to anyone attempting to walk underneath it.
Licensed electricians understand the nuances of load calculation. They ensure that adding a fan to an existing circuit will not overload the breaker, causing nuisance tripping. They also possess the specialized tools to reach high foyers and vaulted ceilings safely, eliminating the risk of ladder accidents for the homeowner.
ReliaBee Air, Electric, & Plumbing prioritizes technical accuracy and safety protocols. The focus is on delivering a finished product that operates silently, moves air effectively, and integrates seamlessly with your home’s design and control systems. Residents in The Dominion can rely on us whether it is a smart fan requiring Wi-Fi setup or a heavy-duty outdoor unit for a pergola, the installation is handled with strict adherence to electrical standards.
Proper installation extends the lifespan of the unit. By ensuring the fan is perfectly balanced and the motor is not strained by poor wiring, you avoid premature burnout. This protects your investment and ensures that your home remains comfortable throughout the shifting seasons.
Ready to improve your home’s airflow and comfort? Secure a professional installation today. Schedule your ceiling fan installation now!

Current Offers for
San Antonio Homeowners
Free Plumbing Safety Check


$59 AC Tune-Up
5% OFF FOR SENIORS
5% OFF FOR VETERANS & FIRST RESPONDERS

5% OFF FOR EDUCATORS


What Your Neighbors Are Saying